
3D MAX чудеса Morpher. Skin wrap. UVtoMESH YouTube
Hopefully the preceding explanation sounds familiar! 3ds Max applies a similar process for each morph mesh. The third parameter for the WebGL mix() function ranges between 0.0 and 1.0. Apply values between 0 and 100 with 3ds Max's morpher modifier. Just scale the values down by 100 to accomplish the same task in WebGL as in 3ds Max.

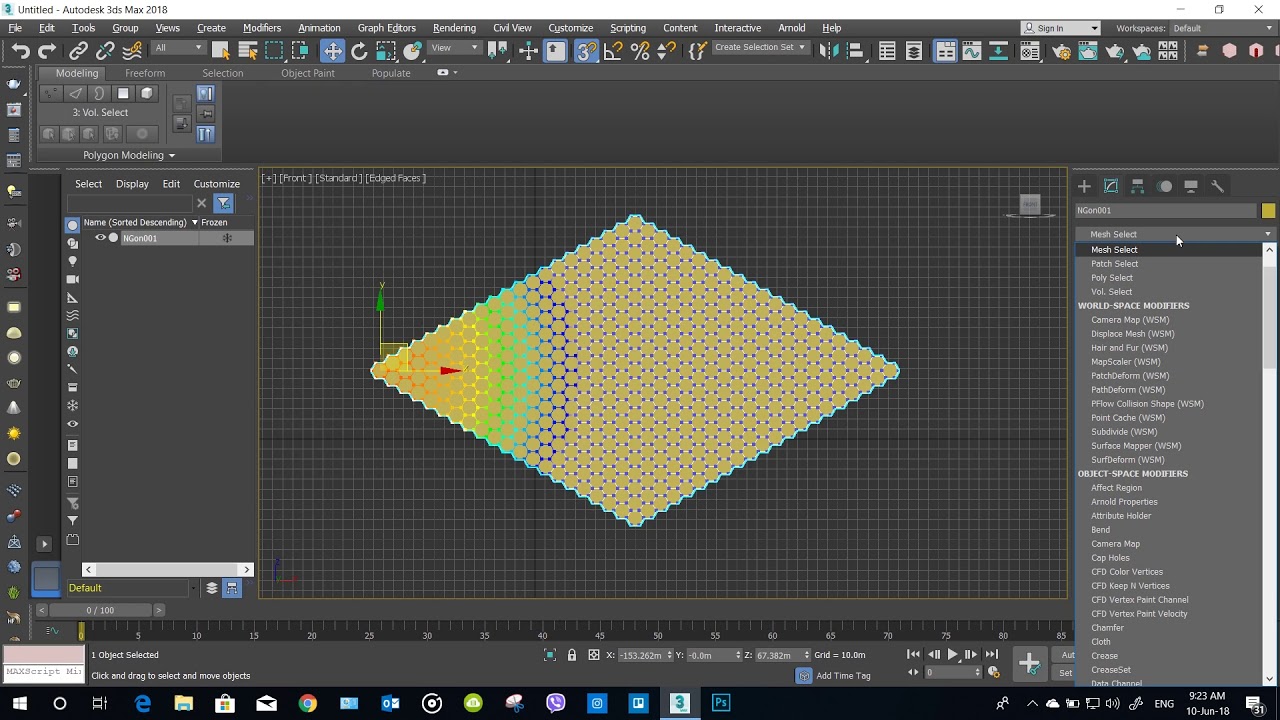
Volume Select and Morpher Modifier in 3ds max YouTube
The Morpher modifier in 3ds Maxprovides up to 100 morph channels, but only 10 of them are visible at a time and can be controlled only using a value spinner. Using MAXScript, we will add a very basic floating UI extension to the Morpher modifier representing and controlling the Morpher channels using progress bars.

Morpher in 3d studio max tutorial YouTube
What's New in 3ds Max 2023.1 Update Morpher Modfier has been optimized to provide up to 30 times faster animation performance and viewport playback. Extensive optimizations were carried out, involving threading, caching, improved explicit normals acceleration, channel and memory management for improved speed.
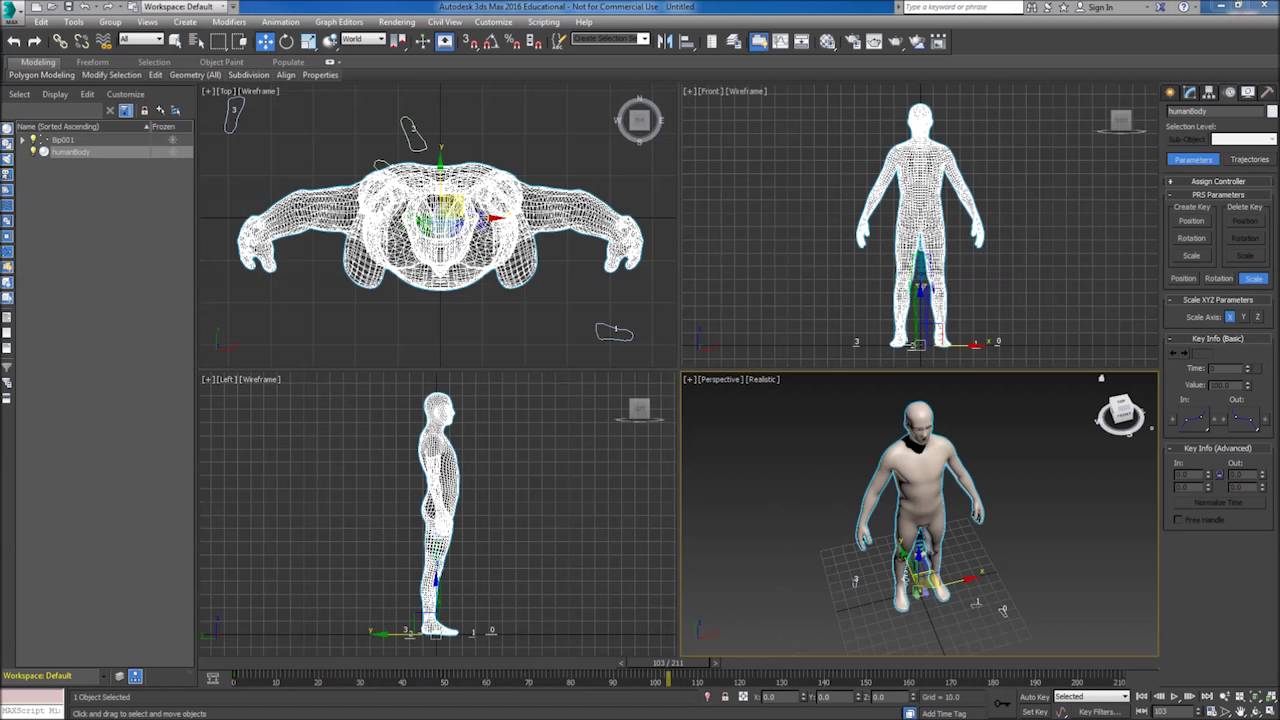
3Ds Max Biped Movement Files and Skinning YouTube
if its just moving.. first make sure the morpher is set to automatically reload targets or none of the following will have any effect. make sure the pivots on all the meshes are lined up. ie. place everything at 0,0,0 and if the meshes are not all on top of each other, make it so they are and align all the pivots to the base mesh (the one with.

Using the 3D Studio Max Morpher to Blend Textures big little pictures
Use the Morpher modifier to change the shape of a mesh, patch, or NURBS model. You can also morph shapes (splines), and World Space FFDs. In addition to morphing from one shape to another, the Morpher modifier supports material morphing. The Morpher modifier also supports unlimited morph targets. Select a mesh, patch, or NURBS object.

Adventure Force Max Morpher Review Blaster Hub
A Tutorial for Morphor feature. Follow these instructions and Video:1. First have an object that you plan on animating.2. Duplicate it.3. Then edit the faces.

Morpher y sliders 3D Max YouTube
Workflow Steps to use Morpher modifier in 3dsmax simply:1- You will need two objects, the model and a reference object to use later!2- Apply " Edit Poly " to.

3Ds MAX Morpher 기능 알아보기 기초 YouTube
This video shows how to combine the Volume Select Modifier with the Morpher Modifier in 3ds max. The Volume Select Modifier gives us the possibility to connect a selection with other.

Tutorial 001 Morphers 3ds Max // Parte 1 YouTube
A Morph object combines two or more objects by interpolating the vertices of the first object to match the vertex positions of another object. When this interpolation occurs over time, a morphing animation results.
3d max 2016 الدرس 46 modifiers = Morpher YouTube
When attempting to animate a mesh using morph target data (facial or otherwise) and a Skin Wrap modifier in 3ds Max, the model animates back to the original T-Pose position instead of only animating the updated vertex or polygon changes. Two different skinning setups are being used for the original mesh and for the morpher version of the mesh. For example, the original mesh and rig system are.

Morpher Transform Animation Trick in 3DS Max YouTube
Version 1.0 (6/14/99)To install, *Download/unzip into \SCRIPTS, open both and evaluate them. *Right-click a toolbar, go to "Morpher" Category and drag&drop the buttons to the toolbar. Morpher_KeyAll: *Select an object with a Morpher modifier. *Press the Button "Morpher_KeyAll". *A key with the current value at the current time will be.

parametric view with morpher in 3d max YouTube
05/13/2010 A set of tools to work with the morph modifier. Features: Put an edit poly over the morph modifier to make any changes, then use the script to collapse the edit poly keeping the morpher operational. Extract the shapes to work on them separately and then load them again with one click.
01 3ds Max Morpher YouTube
In this tutorial, you take a look at the concepts of morphing in both 2D and 3D. When you are comfortable with the basics, you move on to analyze a scene you.

Skin Morph in 3ds Max 3ds max, 3d character, Zbrush
Open the Material Editor, select the Morpher material, and click Choose Morph Object in the Parameters rollout, then click the object in the viewports. After clicking the object, a dialog displays in the viewports, select the Morpher modifier from the dialog (an object may have multiple Morpher modifiers).

3ds Max Tutorials Morpher Modifier YouTube
This tutorial shows trick with conform tool, that how you can make morph transformation while objects has different topology.

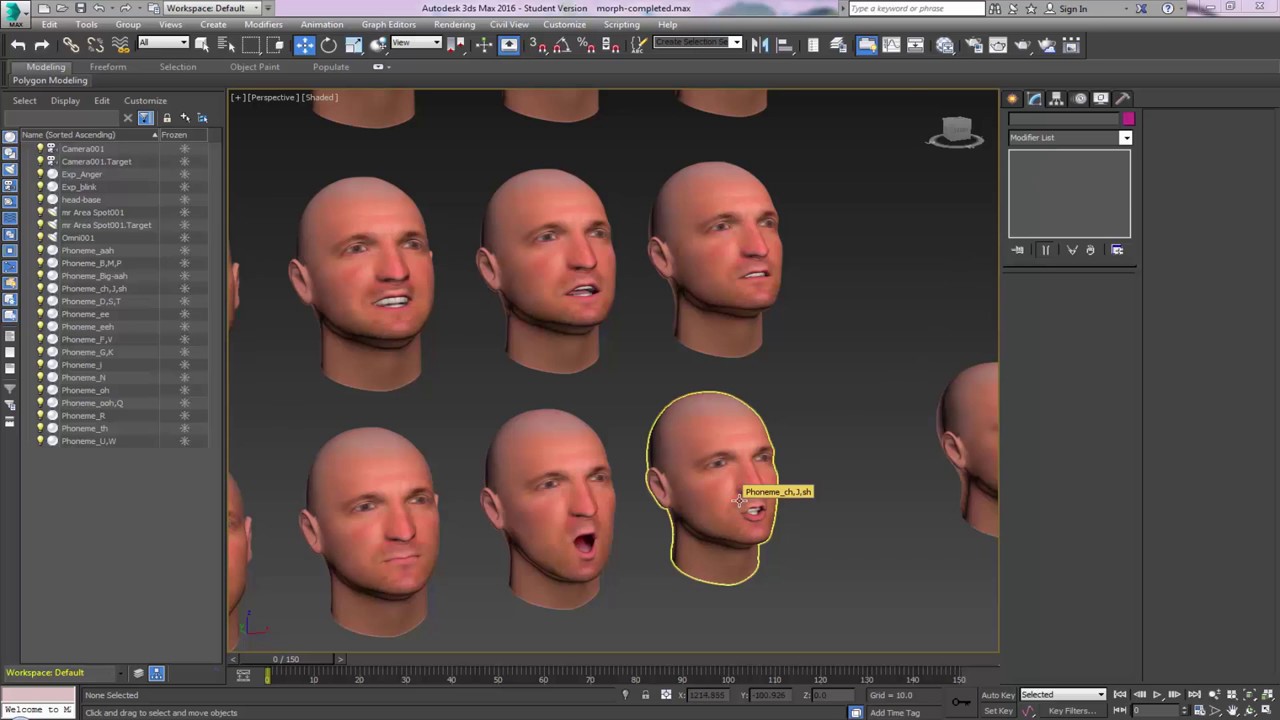
3D Studio Max Tutorial on Morph Targets YouTube
How to create quick facial Morph Targets for a character using the Morpher modifier in 3ds Max. Solution: The following video describes how to create simple facial Morph Targets for a character. For more information on the Morpher modifier in 3ds Max see this article.
